2 min read
Lookbooks & Hotspots
Lookbooks are full-screen images that can be browsed by the user in a "digital catalogue" style, and can be linked to products either through hotspots on the image or as a shop the look modal.
Shop the Look
Adding a new lookbook
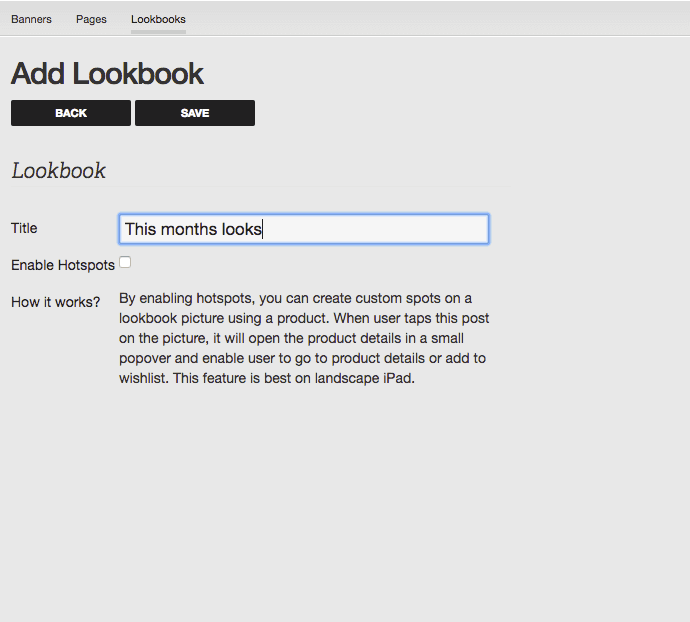
Simply click on ‘Add New’ in the top menu under ‘Lookbooks’. Give the Lookbook a title, and press ‘Save’.
You’ll now need to add images to this lookbook. This works in the same way as adding pictures anywhere else in the app – click ‘Add Picture’ and then upload a new image.
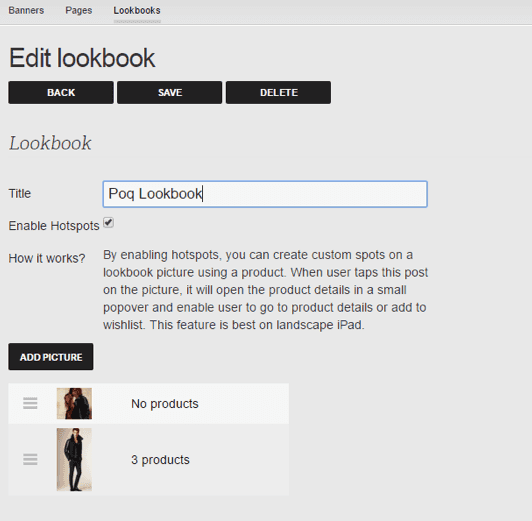
Once you have added a new lookbook and uploaded an image to it, you’ll have a screen like this:
Now you need to go in and link products to each individual image. There is no limit to the number of products you can add to each image. Only two will be visible below the image at once, but customers can swipe back and forwards to view the other products. We recommend adding less than 4 or 5 products to each image to make it easier for customers.
Adding products to a lookbook
To add a product to an image, click on the link that says how many products there are (in the image above, it says ‘no products’).
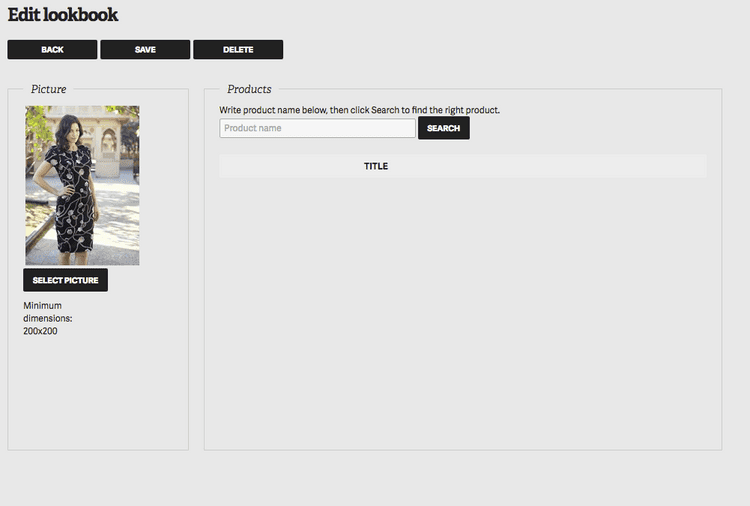
You’ll see this screen:
Simply search for the product you’d like to add, and when you see it pop up, click on it. It will automatically be added to the lookbook image.
Hotspots
Enabling hotspots for lookbook
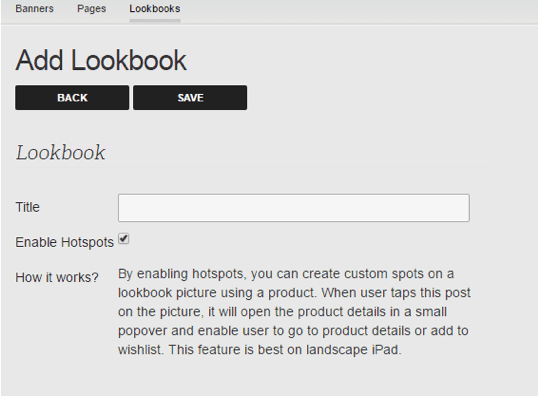
Lookbook hotspots can be enabled while creating a new lookbook or on the edit page of an existing lookbook. You just need to tick the “Enable Hotspots” checkbox as shown below.
Editing hotspots of products
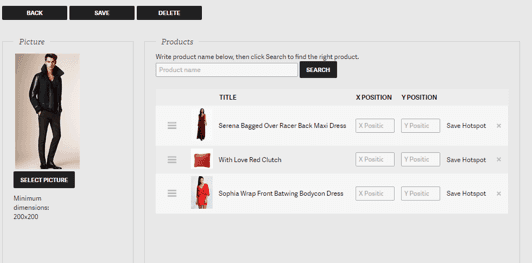
Once hotspots are enabled, you need to navigate to lookbook pictures by clicking one of the lookbook pictures. On that page, there are a list of products and if hotspots are enabled, you should see “X Position” and “Y Position” options next to each product. Please make sure the products are available in the app so can be visible.
To set the position of a product, you need to enter X and Y position for each of them and click “Save Hotspot” button.
How to set the X and Y coordinates
X and Y coordinates will be based on the pixels set when creating the images in the designer’s tool (e.g. Sketch or PSD). As a guide, full-screen portrait images will be 750 x 1334 or if created specifically for iPad 1536 x 2048.
Enter the X and Y coordinates for each product and click “save hotspot” after each entry
Please note:
- If you do not set a correct X, Y coordinate then the hot spots will not appear on the screen.
- If you do not set any coordinates, the product will not appear on the lookbook
- It is not advised to set coordinates as 0,0 as it will cut off the “X” button
