1 min read
App styling
App styling allows you to style the colors, icons, and fonts of your whole app with minimum effort. To do so, a custom Android Studio plugin will generate all the necessary XML style files from a JSON. This file is generated from the styles applied by your designer in the app manager web tool.
How to install the Android Studio plugin
In order to use App Styling you need to install an Android Studio plugin, to do so:
- Download AndroidAppStyling.zip.
- In Android Studio go to
Preferences -> Plugins -> Settings -> Install Plugin from Disk…and select the downloaded zip file. - Restart Android Studio.
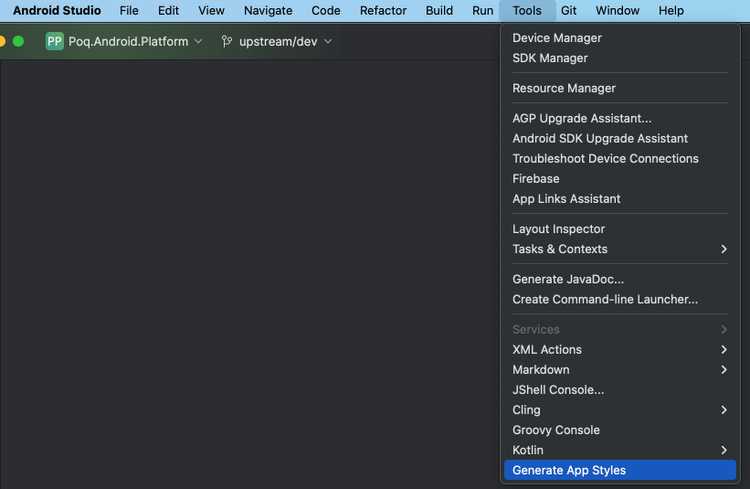
- Now Android Studio shows a new option called AppStyling:
How to apply it
To apply the styles you need to download the files from the app manager web tool. When you click in Download zip, you will obtain a JSON and a zip file.
With the JSON file:
- Go to Android studio and click in
Tools -> Generate App Styles. - Copy and paste the content of the JSON file in the dialogue window.
- The plugin will generate all the necessary files and in the right folder to style your app.
With the zip file:
- Extract the zip file.
- With Android studio resource manager import the folders
/android/iconand/android/images. - Create a new resource folder in your project called
fontand copy the content of/android/fontto it if it exists.
How to apply it to your custom layouts
When you create or customise a layout, you should use one of the generated App styling styles for your views. Doing so, your new layout will show the new styles when you reapply app styling.
- For texts, use one of the defined styles in app_style_labels.xml.
- For buttons, use
ButtonPrimary,ButtonSecondaryorButtonTertiarydefined in style_buttons.xml which inherit from app styling styles. - For colours, use one of the defined in app_style_colors.xml.
- For drawables, use of of the defined in app_style_drawables.xml.
