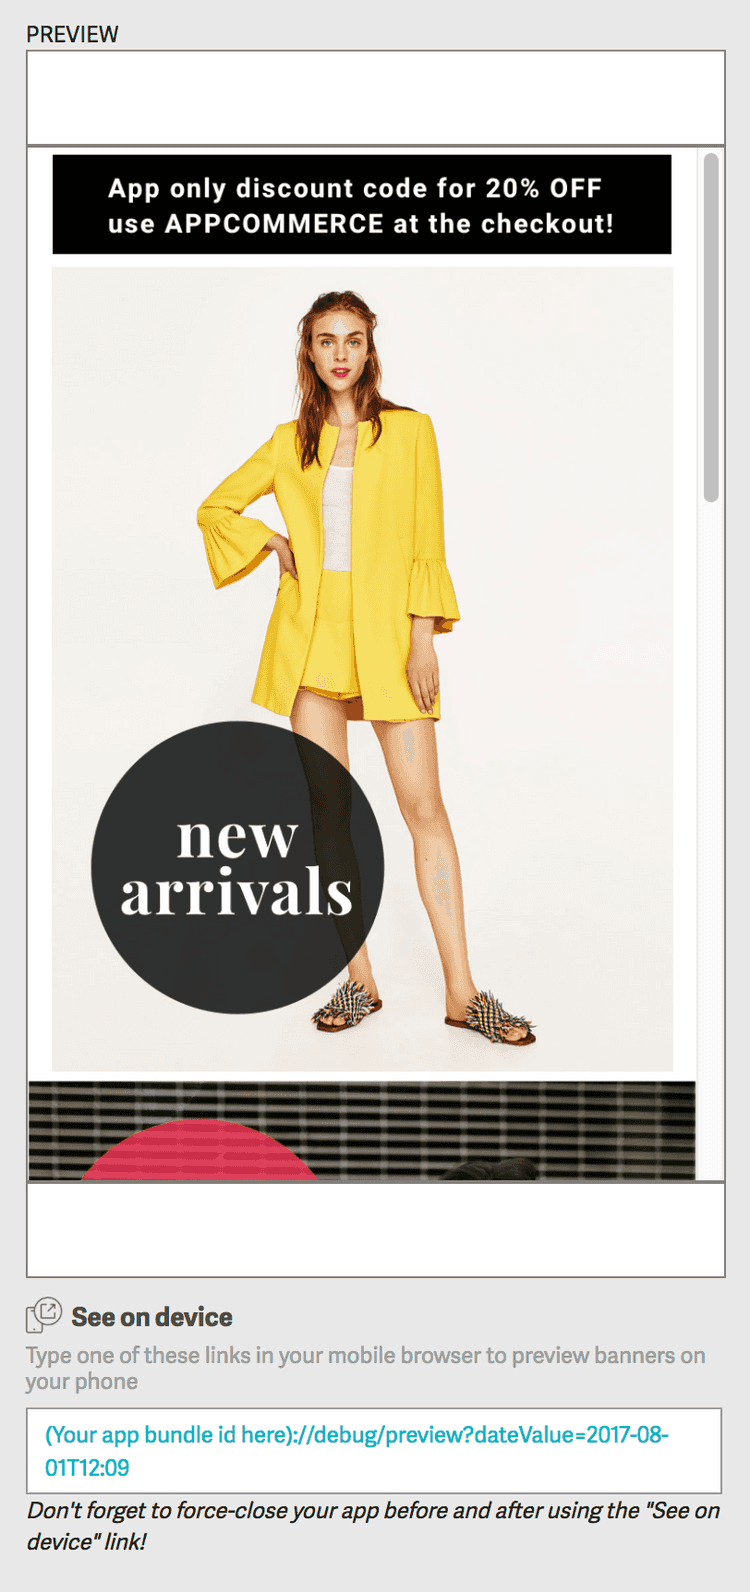
5 min read
Home Screen Banners Legacy
The guide for the new, App Manager Banners tool can be found here.
The home screen is the first screen that appears after the app has started, it is connected to the CMS where all the content can be managed.
You can use the Poq CMS to add banners to promote products and special offers in your app.
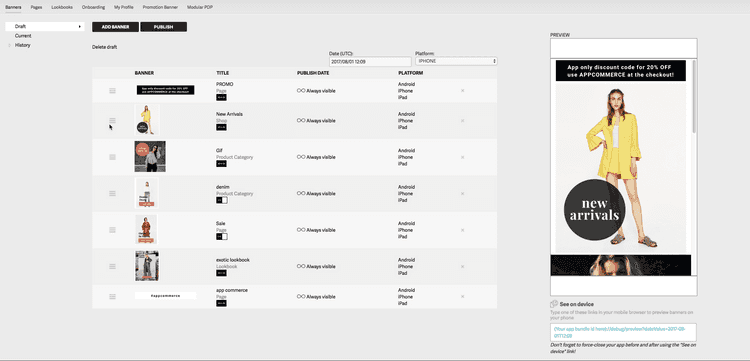
Add a new banner
When you add a new banner, it is automatically added to your Draft list. You can schedule the dates it should be visible, the banner type, and select an image that will grab your customers' attention. When you have added the banners you require, you can publish your list.
To add a new banner:
In the Poq CMS, click the Content tab in the top-right navigation menu. Open Banners in the navigation menu. Your current, published banners are displayed. If you have not yet published any banners, this list is blank. To create a new banner, open your draft or click edit.
Here you can edit and rearrange existing banners as well as add new banners. There are currenty 3 types of home screen banner content: images, videos and product carousels.
Image
A full width or half width image or gif you can upload or select.
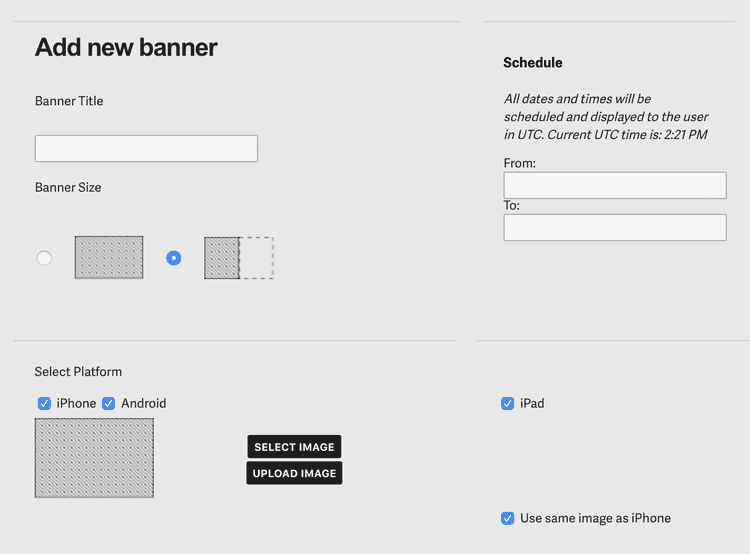
- Enter the title for your new banner (this title will be used by assistive technologies for accessibility so make this descriptive. e.g. include any text embedded in your image).
- Choose Image from the content type dropdown.
- Use the radial buttons to choose whether to create a half-screen or full-screen banner.
- Under Schedule enter the dates you want the banner to be live in your app.
- Use the checkbox buttons to select which platforms you wish the banner to appear on.
- Choose the image or gif for your banner. Click Select image to use an image or gif already uploaded into the CMS, or click Upload image. If you want to select or upload a different image or gif for iPad, unselect "Use same image as iPhone" checkbox.
- Under Visibility, choose whether the banner will be visible when published. You can edit this setting at any time. If a banner is hidden, it will remain hidden regardless of the schedule. If you want it to appear at a certain time, set this to visible and set the schedule.
- Use the Type menu to choose the type of screen that is shown when your customer taps the banner. Choose from:
- None - for display only without any interactive elements.
- Page - select a page from the Pages CMS section.
- Product category - opens the product listing page.
- Hyperlink - any URL that you specify, displayed within the app. This will open a webview if a standard URL is provided or will open a screen if an app deep link is provided.
- Shop - the Shop screen in your app.
- Lookbook - any lookbook you have already set up.
- Store finder - your store finder page.
- Use the Padding fields to set space around your banner (available on request).
- When you are finished, click the Save button towards the top left of the screen.
Banner image sizes
Because because of the way that banners fill the screen, there is only a recommended width size for banners:
iPhone/Android phone: Between 750-1334px wide. iPad: Between 2048-2732px wide. If you want to use the same image for both phone and ipad. Optimal for both: 2048px wide.
Video
v21 and above
A video that will autoplay and loop in line when the customer scrolls to it.
- Enter the title for your new banner (this title will be used by assistive technologies for accessibility so make this descriptive).
- Choose Video from the content type dropdown.
- Enter the URL in the video url box (the CMS doesn't validate this URL so please check this works before publishing)
- Select the video aspect ratio - the video will be stretched/shrunk to fit this ratio so ensure it is correct
- Under Schedule enter the dates you want the banner to be live in your app.
- Use the Type menu to choose the type of screen that is shown when your customer taps the banner. Choose from:
- None - for display only without any interactive elements.
- Page - select a page from the Pages CMS section.
- Product category - opens the product listing page.
- Hyperlink - any URL that you specify, displayed within the app. This will open a webview if a standard URL is provided or will open a screen if an app deep link is provided.
- Shop - the Shop screen in your app.
- Lookbook - any lookbook you have already set up.
- Store finder - your store finder page.
- When you are finished, click the Save button towards the top left of the screen.
Product Carousel
v21 and above
You can specify a category or custom URL of products to display in a carousel or opt to show the customer's recently viewed products.
- Enter the title for your new banner (this title will be used by assistive technologies for accessibility so make this descriptive).
- Choose Product Carousel from the content type dropdown.
- Under Schedule enter the dates you want the banner to be live in your app.
- Use the Type menu to choose the products that will show in the carousel.
- Product Category - Select a category to load the products from.
- Url - Enter a custom Url endpoint to return products from (requires custom work/creation of custom endpoint).
- Recently Viewed - shows the most recent products the customer has seen.
- When you are finished, click the Save button towards the top left of the screen.
Publish banners
Once you have scheduled your draft banners, you can publish them to make them live.
Time travel
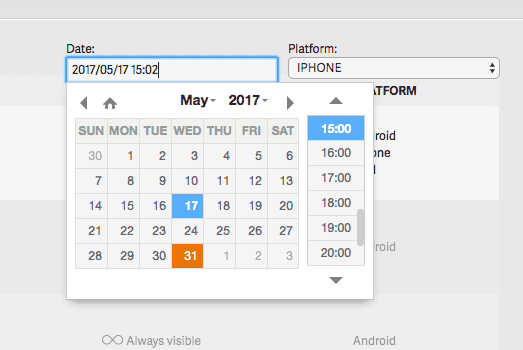
To preview banners that are set to go live at a later date, simply choose the date selector and select a time and date in the future. Once you have selected the new date, the page will automatically reload to reflect the how the banners will appear on the chosen date/time.
History
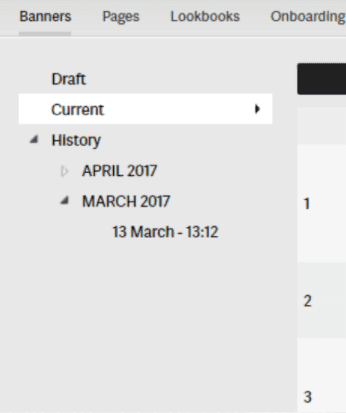
As new versions of the home screen are published, previous versions will be archived in the ‘History’ section. Versions are grouped by month and labelled with their month, date and time. We will store previous versions for up to fourteen months and for each set of banners you can see how it would look for any date on any platform.
Create/edit draft
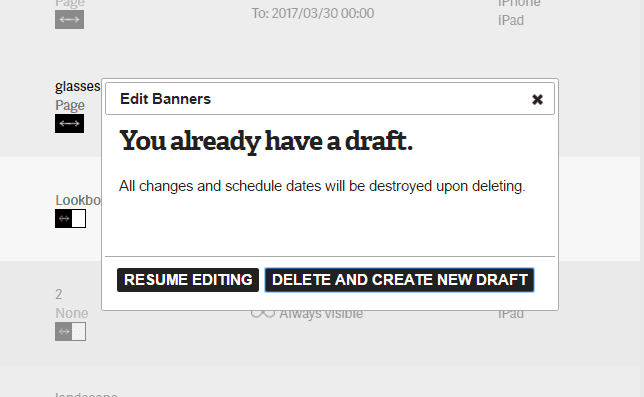
By selecting the edit button you will be taken to a draft view where you can edit or create new drafts. If no draft exists, one will be created by duplicating the existing current banners. When there is a pre-saved draft you will be presented with the option to continue editing or start fresh.
In-app preview
You can preview banners directly on a device rather than waiting till they have been published.
Whilst in draft mode, simply follow the instructions located below the preview section to view the banners on your device.
Once the URL has been input into your mobile browser the app will open in preview mode set to the time and date selected.
To reset the app to the original banner layout you need to force close the app and restart.
